Mail or Jail Shifts
Seven shifts stand between your first truck unload and a complete run. Learn pacing, pressure spikes, and endings here.
Mail or Jail structures its entire campaign around seven shifts, each one stacking more deliveries, tighter verification pressure, and harsher punishment for sloppy work. Delivery Day Studios built the Roblox experience around a simple hook: unload the morning truck, check customer IDs carefully, deliver mail to the right people, catch package thieves, survive random events, and avoid the firing screen when mistakes pile up.
This shifts hub links the deep guides players search for after a bad run: a full walkthrough from Shift 1 through Shift 7, focused Shift 1 tips for beginners, and an endings breakdown for fired runs versus successful clears. Cross-read controls so you are not fighting inputs while learning route timing, and keep event survival tips open because hazards rarely wait for you to finish a delivery.
How a shift flows
Every shift in Mail or Jail follows the same backbone with rising difficulty:
- Morning unload — Pull parcels from the delivery truck at the depot. Missing items or careless handling feeds the mistake counter early.
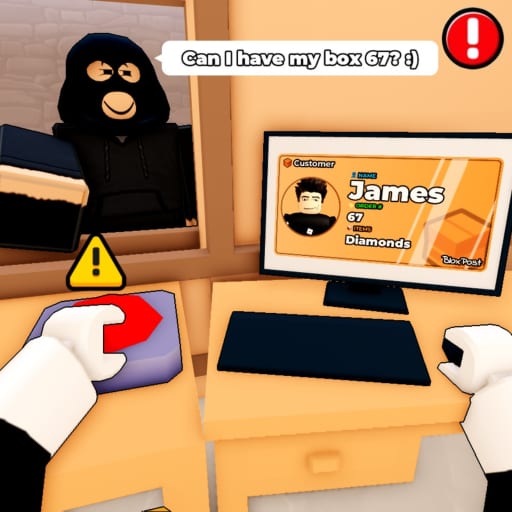
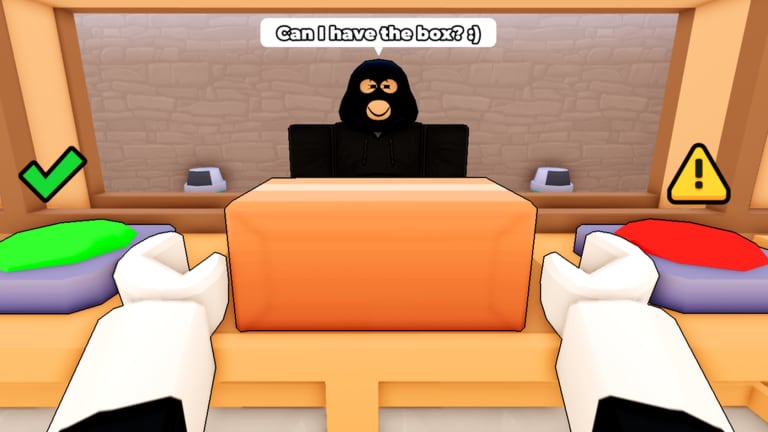
- ID verification — Compare portrait, name, and address on each customer against the package label before release. Thieves disguise themselves; lazy approvals end runs fast.
- Route delivery — Carry mail to marked houses in order when the game demands sequence. Wrong-door drops are classic postal sim failures.
- Thief response — Intercept NPCs stealing packages and send them to jail using the arrest interaction. Hesitation lets them escape with your cargo.
- Random events — Shift-wide hazards from the events hub interrupt routing. You keep delivering while events tick.
- Shift review — Survive with mistakes under the firing threshold to advance. Fail and you see the fired outcome documented on our endings page.
Understanding that loop once saves hours of repeated Shift 1 restarts.
Difficulty curve across seven shifts
Early shifts teach fundamentals with forgiving mistake budgets. Mid shifts introduce denser routes, trickier ID mismatches, and more frequent thief spawns. Late shifts combine everything: faster event cadence, less time between houses, and verification edge cases that punish autopilot. Players who only memorize Shift 1 layouts often fail Shift 4 because they never built verification habits.
Use the ID verification checklist between shifts to log which checks you skip under pressure. Pair it with the mistake tracker so you know how close you are to firing before accepting a risky delivery.
Featured shift guides on this wiki
| Guide | Best for |
|---|---|
| Full walkthrough | Seeing every shift back-to-back with pacing notes and ending context |
| Shift 1 tips | First-day players learning unload order, first thief, and safe mistake habits |
| Endings | Understanding fired runs, full clears, and what changes on repeat attempts |
| Mid-shifts strategy | Shifts 2–5 pacing, event stacking, and mistake budgeting before the late-game wall |
| Late-shifts strategy | Shifts 6–7 zero-margin play, reset vs push decisions, and prep from mid-shifts |
The walkthrough page embeds a complete Shift 1–7 video for visual learners. Shift 1 tips narrows to the tutorial pressure most players feel in their first twenty minutes. Mid-shifts strategy covers the rising-pressure window where routes, thieves, and random events overlap — most players who clear Shift 1 still fail here without adjusted pacing. Late-shifts strategy is the back-half companion: compound pressure, refusal-only ID reading, and when to restart instead of pushing into Shift 7 on a depleted mistake budget.
Mistakes and getting fired
Official game text is blunt: too many mistakes and you are FIRED. That is not flavor text. Wrong IDs, missed thieves, bad deliveries, and event failures all feed the same pressure pool. Treat every shift like a job review, not a sandbox. When you are learning, slow down at the ID panel even if the route timer feels tight—one bad approval costs more than ten extra seconds of reading.
Group bonus and session prep
Before marathon shift attempts, like the experience and join the Delivery Day Studios Roblox group (372114481) for the published bonus. Redeem anything active on the codes page so cosmetics or boosts do not distract mid-shift. Read the Guides hub for broader strategy that complements shift-specific pages here.
Related reading
- Controls hub — Platform bindings for truck, ID, and jail inputs
- Random events — Hazard catalog that spikes mid-to-late shifts
- Mail or Jail review — Difficulty and fairness notes from a full campaign perspective
- Event survival tips — Macro habits that keep mistake counts low
Seven shifts is a short campaign on paper and a skill check in practice. Pick a guide above, finish Shift 1 cleanly, then return here before pushing into the back half where most players get fired.
Frequently Asked Questions
Quick answers players ask after every shift.
How many shifts are in Mail or Jail?
The official experience describes seven shifts from first truck unload to final evaluation. Our [full walkthrough](/shifts/full-walkthrough/) covers each one in order.
What happens if I get fired?
Too many mistakes trigger the fired outcome, ending your current run. See [endings](/shifts/endings/) for how that differs from clearing all seven shifts.
Which shift is hardest?
Player reports cluster in the back half where routes, thieves, and [random events](/events/random-events/) overlap. Late-shift prep matters more than Shift 1 memorization.
Where should beginners start?
Read [Shift 1 tips](/shifts/shift-1-tips/), confirm [controls](/controls/) for your device, then follow the [full walkthrough](/shifts/full-walkthrough/) when ready.